Speed 400
Cloudster Project
I have had little
time to work on the Cloudster the last couple of days, however I did manage
to get the rudder and elevator push rods stabilized and finished out today.
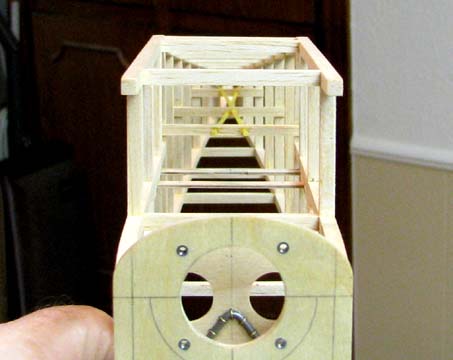
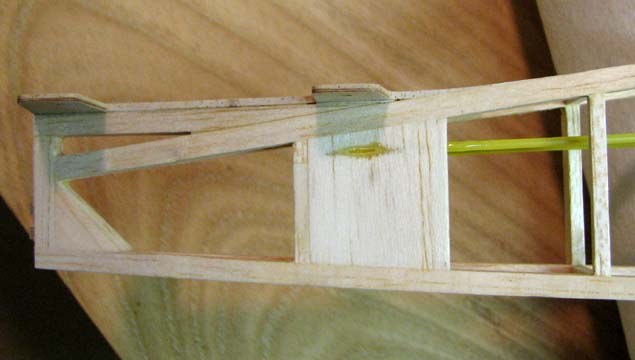
In the front view of the fuselage below, you can see the three 1/16" X 3/16"
balsa cross members holding the two push rods in position.
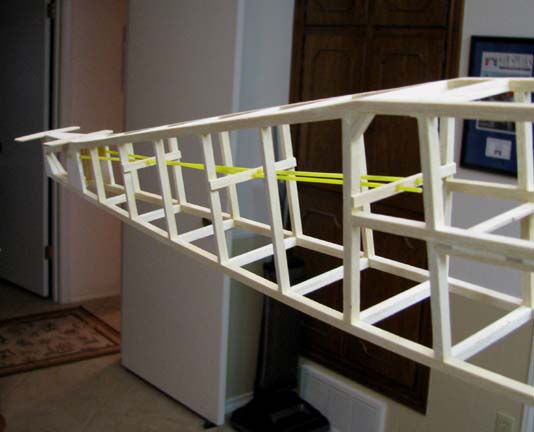
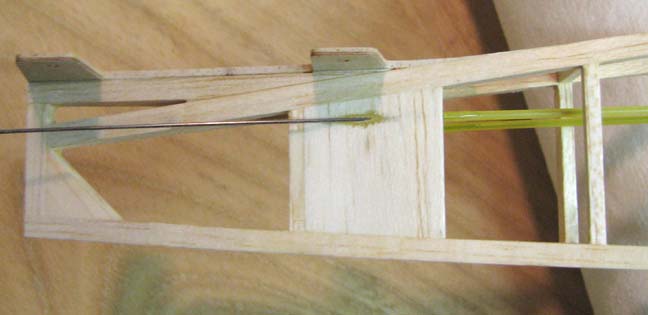
This is a different
perspective of the cross members in this view looking in from the right
side. The yellow sheaths have been sanded on the outside to scuff the
exterior surface to enhance their CA bonding to the cross members.
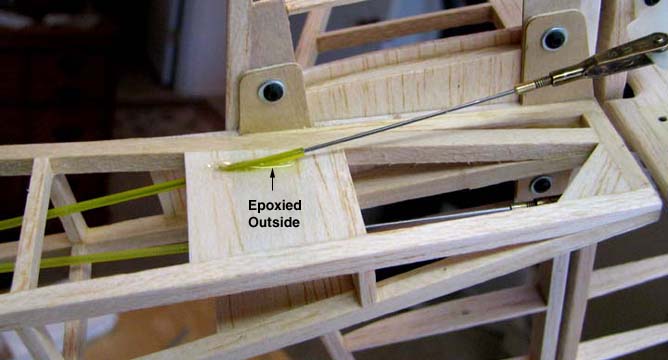
This picture shows
the push rod exit at the rear of the fuselage where it emerges out of the
3/32" X 1-1/4" balsa filler sheet. The yellow sheath was extended out the
back a little further than shown. 15 minute epoxy was then mixed up and the
sheath was coated liberally on the outside and inside of the filler sheet
with the epoxy. Then the sheath was both pulled back into filler sheet
and rolled over and over at the same time to coat the inside of the exit
joint. It is important that the push rod clevis be engaged in the control
horn so that the yellow sheath angle is held in its proper position while
the epoxy sets up.
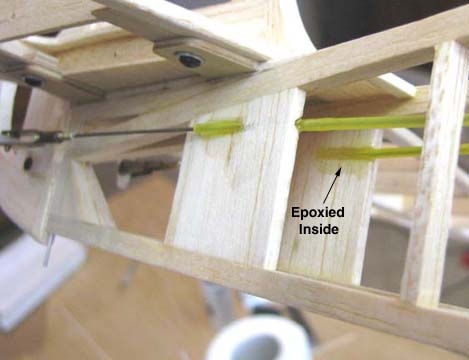
This picture shows
the epoxy coating from the inside of the filler sheet.
Once the epoxy was
thoroughly cured, the epoxied yellow sheath was coarsely ground down with a
Dremel barrel sanding drum, but not too close to the filler sheet. Final
sanding was done by hand, leaving a neatly inlaid elliptical opening flush
with outside of the filler sheet as shown below.
This picture shows
the clean exit of the 1/32" push rod out of the fuselage's side at just the
right angle.
This completes the
Cloudster's push rod installation. The next task will be to develop all of
wing's rib and wing tip patterns in preparation for building the wing
next.............................Tandy