Speed 400
Cloudster Project
I want to review a problem I had before I ever
got started on the windshield. When I was using the Weldbond glue on the
test case yesterday, I noticed that it was somewhat thick and difficult to
spread. So I called Albert Pardue in Alabama this morning to discuss two
things with him. First I wanted to know how thick his Weldbond Glue was.
Well, he said it was not thick at all and referred to it as "creamy" in
viscosity. While I was talking with Albert, I also asked him how he glued
his windshields on. He said he puts the glue along the top and two side
edges, but NONE along the bottom edge. He pulls the windshield down
tight with blue masking tape and then let the Weldbond glue dry thoroughly.
Then he used 1/8" black striping tape around the bottom to seal it. He said
one could also apply the Weldbond glue sparingly along the bottom seam with
a tooth pick, but you have to be very careful.
I went to the hardware store and bought a
new bottle of Weldbond glue. The store clerk let me unscrew the top and
check it out before I bought it. Sure enough, it had that creamy consistency
that Albert described to me this morning. So I did in fact have a bottle
that had gone bad.
The first step was to cut the windshield out of a
sheet of the .005" DURA-LAR with the pattern taped on it and do a trial fit
on the fuselage frame. I really like the 3M transparent tape
(sometimes called Magic Mending Tape)
for taping the DURA-LAR down with. As you might expect, the windshield cut
out didn't fit too well, even though I thought the tailored pattern did. You
really have to be patient trying to fit windshields because the material is
"springy" and it is hard to get a good fit on all edges. As a matter of
fact, it wasn't until the third windshield cut out that I got the fit to be
acceptable.
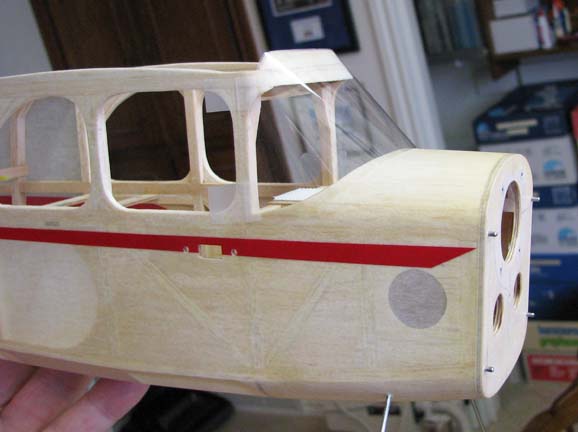
The picture below shows a side view of the trial
fit of the third windshield cut out held in place with four small pieces of
tape. The trick was to get the windshield material at the right angle so it
would lay down flat against the upper wing stop.
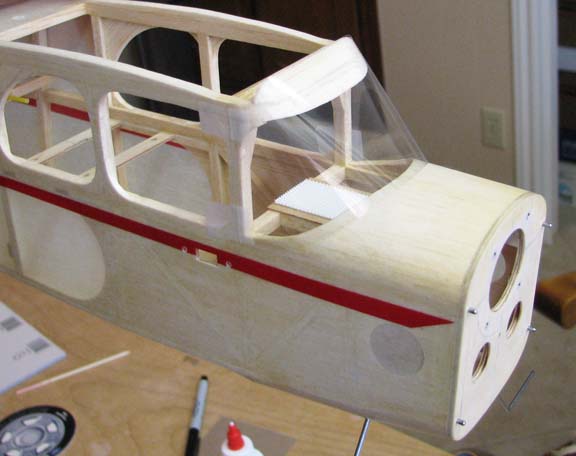
This shows a second view of the trial fit more
from the front to show the nice smooth contact of the windshield's lower
edge around the fuselage turtle deck.
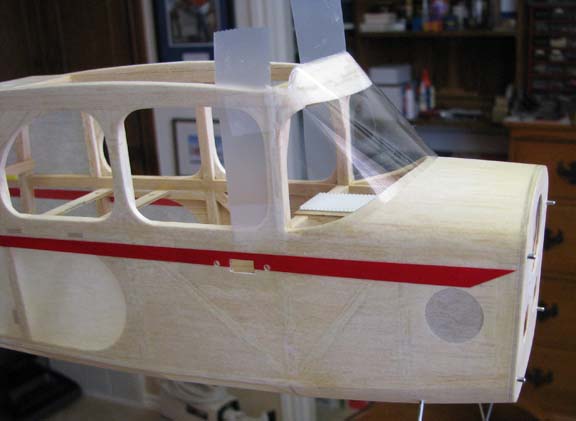
This shows the third view of the trial fit more
from the top. The DURA-LAR's .005" thickness is just right for this type of
windshield.

Finally the Weldbond glue was carefully applied
to the top and both side edges and the windshield cut out was put in place,
taping the right edge down first with two small pieces of tape. The
windshield was wrapped around the frame and the left edge was pulled down
tight and taped in place with two small pieces of tape. Using my thumb and
finger, I squeezed the material against the frame to spread out the glue
under the windshield and wiped off the excess with a damp rag. Then I came
back and taped both of the side edges down tight against the vertical frames
with a long piece of tape as shown below. Unfortunately, I did get a little
of Weldbond glue onto the windshield inside, but hopefully it will dry clear
enough to not be too noticeable. Albert's advice to not put glue on the
windshield's lower edge, at least during the initial installation, kept me
from getting into trouble.
Now I will let the windshield completely dry
overnight before even attempting to remove the tape. I will be thinking
about what to do with the unglued lower edge of the windshield. I may try
to carefully put glue along the intersection of the windshield and the
fuselage's turtle deck, but I am not sure yet. If it turned out too bad, the
seam can always be covered up with thin black striping tape as Albert
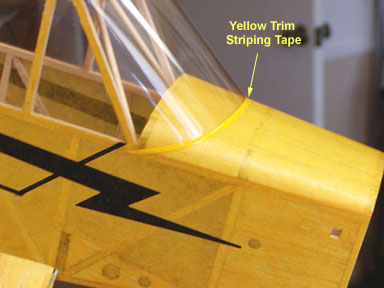
suggested. In fact, I secured the bottom edge of my rubber powered J-3 Cub's
windshield that way, only using 1/16" yellow striping tape as shown below.
The tape has stayed down for a couple of years now. I would appreciate any
feed back or critique you might have concerning my approach to this
windshield installation.........................Tandy