Comet "Phantom Fury" Construction Project Session #9
Comet "Phantom
Fury" Rubber Powered
Free Flight Model Airplane
By Tommy Gray
AMA 17063
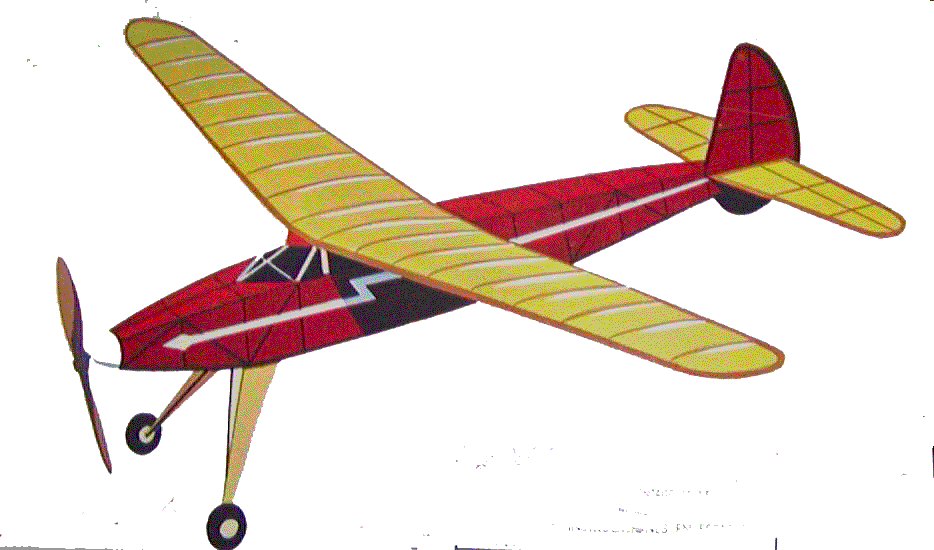
In this session you will see some of my prop carving adventure. The little Phantom Fury kit that I had from Comet Models had a little 6" or so plastic prop that came with it. The Jim O'Reilly plan I used to actually build the Bob Holman Laser cut kit from however, had the specs and layouts for a 10"+ balsa prop as is used in most competition SAM models. I opted to use the competition prop for my model.
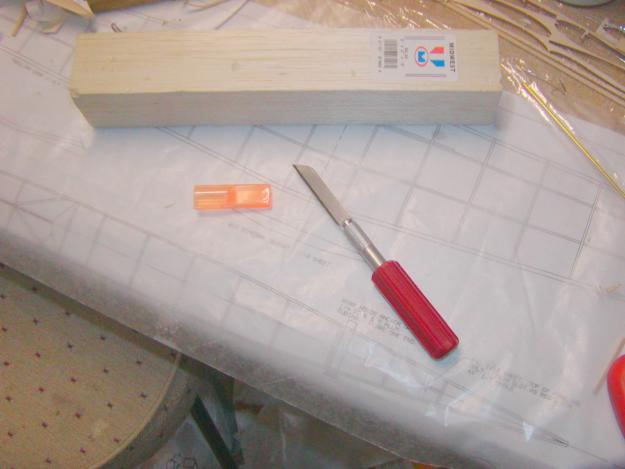
To start with, I purchased a 2"X2"X12" balsa block from the area hobby shop (simply because it was the only block of a suitable size they had in stock). I then laid out the pattern on the blank per the plans. Several months back, I received from my friend and fellow SAM member extraordinaire, Ed Lamb, a very nice video on prop carving. I used the instructions in this video to carve my prop by. Though the one in the video was smaller than mine, it gave me the needed guidance for my prop.
I also asked for input from the SAM_Talk Internet listserver and got a lot of good input and pictures, etc., from the many experts there. Putting all my data together, I started carving the prop. I had already purchased a nice carving knife off the Internet a few months back to do the job with, as I was also going to try to build a Twin Pusher for the SAM Champs Mass Launch (if I have sufficient time). Being SAM Secretary cuts a lot into my building time, but I enjoy serving the organization and am happy to contribute what I can to such a wonderful group of folks. As a result the Twin Pusher may have to wait until a later time!
I started building my "pile of shavings" by as they say, "Carving off everything that does not look like a prop", and I got this rough prop carved out. The curved section in the middle was formed by wrapping sandpaper around a balsa putty jar. Any curved jar or object would work equally as well.
.JPG)
.JPG)
I used a CA kicker bottle with sandpaper wrapped around it to shape the undercamber you see in the picture. The previous shot showed that I still had a lot more wood than desired, according to some I let look at it, who were knowledgeable in on the subject. So in the finished prop, I sanded a lot of it out. I also did a lot more thinning and shaping from what you see in these pictures.
I don't plan to go into details as to how I carved the prop as there are a lot of good tutorials out there readily available, and I don't want to take time to re-invent the wheel so to speak, as the others probably are much better than mine anyway!!
After a lot more sanding it is starting to come together.
.JPG)
In the picture above you might have noticed the apparatus in the center of the prop. It is called a free wheeling prop setup. This particular type is called a "Garami Free Wheeler" after Lou Garami who came up with the idea back in the 1930's as I recall.
Here are a few more pictures of the free wheeler setup. Please note that this is NOT the final setup, just a prototype I put in it for experimentation purposes. It is not permanently attached to the prop, just tacked in place for now.
First here is what the plans showed with regard to the free wheeler.
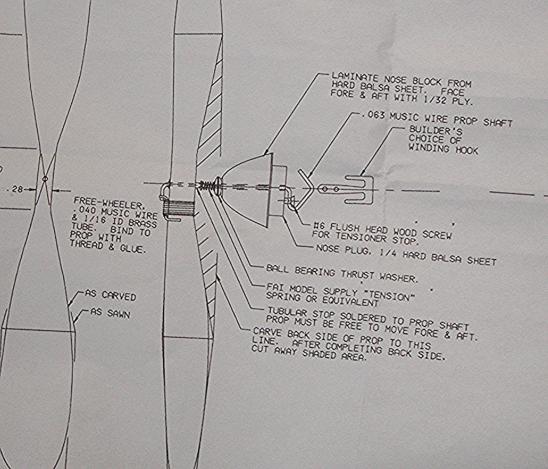
Mine is slightly different as I looked up different designs on the Internet and found another one that is slightly different, though it operates the same way.
.JPG)
.JPG)
Basically it works this way. You might be able to deduce from the pictures how it happens, but here is a brief explanation. When the rubber motor is wound it pulls the prop rod tight against the nose block. the bent piece of the rod end catches on the little tab on the free wheeler mechanism, and engages it to turn the prop. As long as the rubber motor is taut and pulling the prop, it stays engaged. Once the motor winds down, it loosens, and the tension spring pulls the rod out and away from the nose block. Once it is loose, the bottom of the prop rod catches on a screw screwed into the back of the nose block and stops it from turning.
The wind flowing across the prop causes it to continue to turn, and as it does, the bent part of the prop rod, comes in contact with the back side of the free wheeler turning with the prop and it falls down, disengaging it from the prop and thus the prop will free wheel because the rod is no longer being pulled by the rubber motor.. Simple enough??
.JPG)
More to come.......Tommy!