Comet Sailplane
Project
Let me see, where to begin? I guess the
best place to begin is with Sergio Montes' message in which responded to my
request for opinions on cowl venting. As you may or may not know, Dr.
Sergio Montes is retired and now is the editor of
the "Free Flight Quarterly" publication out of Australia. He is on my
Sailplane distribution list and I value his opinions greatly because he is
not only an experienced modeler, but has a Ph.D. in aeronautical engineering
(maybe fluid dynamics). On Saturday, June 27, 2009 I received the
following message from Sergio:
Tandy,
I must tell you about
the cowling. It was a work of art but the big holes do detract from its
appearance and IMHO (in my humble opinion) they
are quite unnecessary. They are already big holes for the cylinder head and
the exhaust slot, probably you do not need much more, as your drawing of a
NACA cowling clearly shows. Look also on the very small air passages of the
Reno racers, subject to longer and more arduous conditions. These holes
(cylinder head and exhaust slot) are in regions of low pressure and they
will efficiently scavenge the hot air. So with much sadness I ask: is there
a way you can cover the multiple holes and return the cowling to its glory?
I would not mention this if I had not realized that your thoughts are in
certain agreement with what I say, why else require so much outside opinion
about something that you know already?...This Sailplane is something very
special and its appearance is the most important point in the construction
process, much more than the fate of the McCoy 60. You will need to plug the
holes with balsa, then cover them with whatever material you were going to
use on the cowl. I am sure you can do one of your superb jobs with balsa,
the covered holes would be undetectable, especially if you match the grain
with existing sheets of balsa. Sorry to be such a pest, but I cannot resign
myself to see that glorious cowl undone by the cooling air outlets. My
hunch is that you have already enough outlet area, judging by the schemes
used in full-size radial engines. See: http://aerade.cranfield.ac.uk/ara/1937/naca-report-596.pdf,
for the performance of several cowlings that
guaranteed good cooling with small outlet area, smaller than the inlet area.
After considering what Sergio had said,
my thinking went something like this:
It had never occurred to me that the
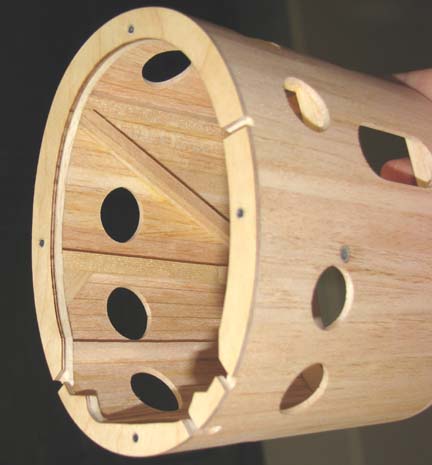
exit air holes I put in the cowl might not be required! I came up with three
approaches in increasing levels of difficulty:
(1) Do not cut out the cowl
covering from around the holes.
(2) Cut inserts for the holes
and try to match the grain as well as possible.
(3) Go back and build a
completely new cowl.
I quickly dropped the first and last
options and concentrated on the second one. The
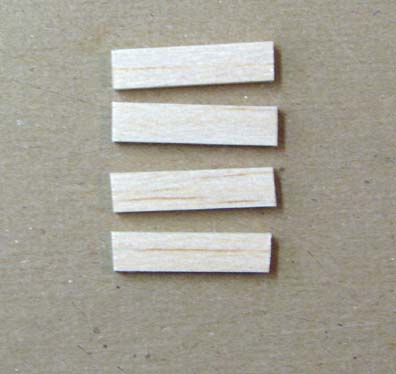
cowl is planked with 3/32" X 1/4" balsa strips. I selected a little thicker
1/8" X 1/4" balsa strip with grain and color close to the wood surrounding
the hole and cut off four short pieces as shown below.
I beveled sides of the four strips and glued
their edges together. However, to get the plug's curvature correct, I taped
wax paper over the cowl and rubber banded the four 1/8" X 1/4" strips over
the hole to be plugged as shown below. This provides for the plug's desired
curvature.

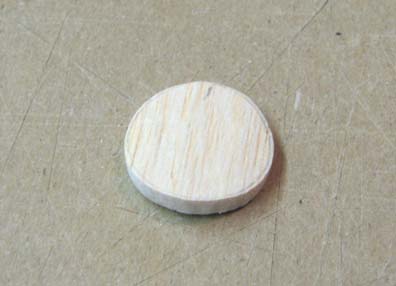
I cut the plug out with a razor blade and
carefully sanded a slight bevel around the edge as shown below.
Then a series of sand-and-try fittings was done
until the plug fit the hole snugly, which takes considerable time. Aliphatic
glue was then put around the inside of the holes and around the edge of the
plug. The plug was forced into the hole until it was flush on the inside,
which left about a 1/16" sticking up out of the hole. Then the excess glue
was I wiped off with water around the outside seam, which effectively
swelled the plug and the edge of the hole together. The water is the real
secret to achieving the final tight fit!
Then the plug was carefully trimmed off and
sanded down flush with the outer surface of the cowl as shown below.
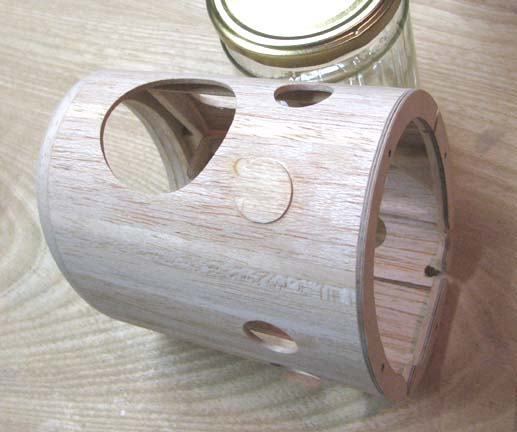
Since there were nine of these plugs to make, I
made several of them at a time using curved glue bottles as shown below.

This shows a view of the left side of the cowl
before all of the holes were plugged.
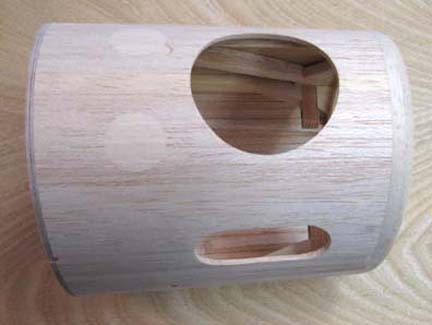
Here is the same view after all of the
holes had been plugged.
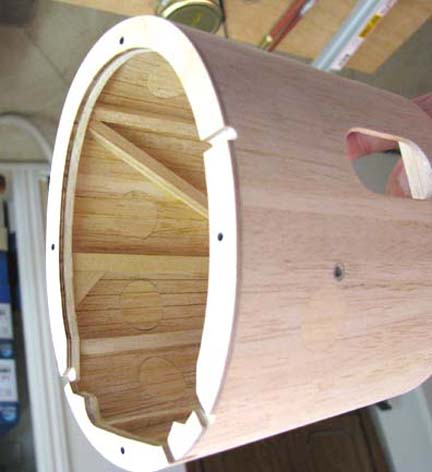
This shows the reworked cowl installed on the
fuselage. You will notice that the color and grain on some of the plugs do
not match too well, but I still think they will not be noticeable after they
are covered and doped. If the engine does end up run hot, I can always cut
out a few of the plugged holes again. At any rate, I feel better about this
whole cowl venting thing.
By the way, over the last few days I have managed
to put three coats of clear dope on the wing's Polyspan Lite covering. Since
Sue and I are flying down to Houston in the morning for the 4th of July
weekend, the three coats of dope on the wing will have plenty of time
to thoroughly dry out. I hope you all have a good 4th of July
holiday.....................Tandy