Comet Sailplane
Project
Before starting the preparation process for
covering the cowl and fuselage, there were a couple of items that needed to
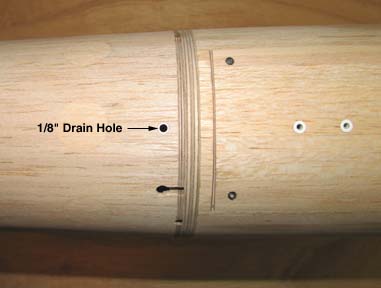
be worked out. First of all, a drain hole was required in the bottom of the
cowl. A small hole was drilled in the bottom of the cowl near the rear
bulkhead. An 1/8" I.D. aluminum tube was CA'd in the hole being flush
inside. Then the end of the tube was filed off flush on the outside as shown
below.
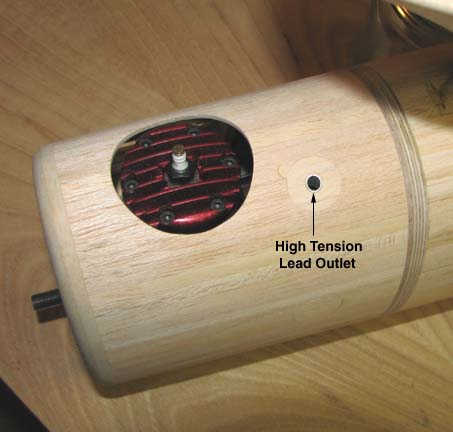
The second item on the cowl that needed attention
was to provide an outlet for the high tension lead. Again, a hole was
located and drilled in the top of the cowl. An aluminum tube large enough
for the high tension lead to slip through was CA'd in the hole and filed off
flush on the outside as shown below.
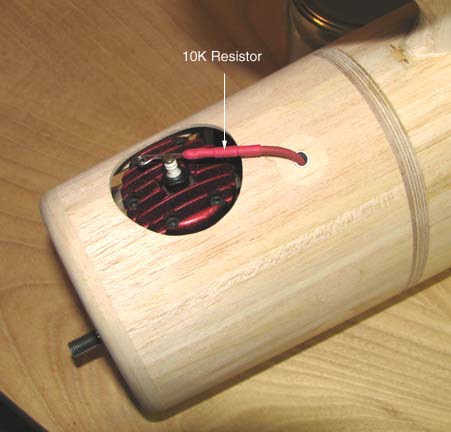
This picture shows the red high tension lead
coming through the outlet and attaching to the spark plug.
Next I started preparing the fuselage structure
for the first covering of Polyspan Lite. The fuselage will be covered in
essentially four sections, top, bottom, and the two sides. Therefore the
covering will be spliced down the length of the fuselage along the four
longerons whose corners have been beveled to act as stringers themselves. As
you may recall, my doping procedure is to coat the structure with a mix of
50% clear nitrate dope / 50% nitrate thinner three times with light sanding
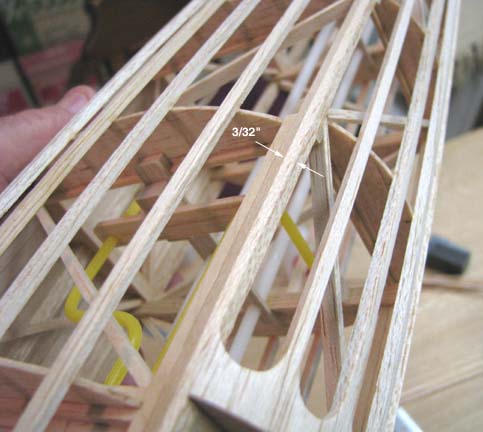
in between coats. As I was putting on the first coat of clear dope on the
fuselage structure, I became aware of how narrow the footprint or edge of
the beveled longerons where the covering splices will be made. The widest
edge is only 3/32" as shown below. It is going to be tricky, if not
extremely difficult, to cut and splice the covering materials along and down
this thin edge. Something had to be done to improve this situation to avoid
a potential covering disaster.
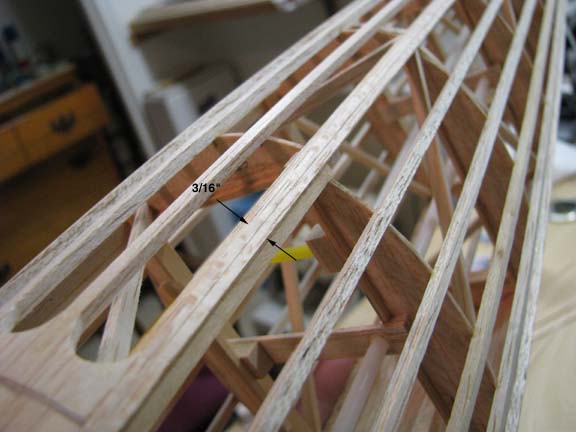
The fix that I came up with was to carefully
position and glue a 1/16" square balsa strip down the entire length of the
longeron along the outside beveled edge as shown below.
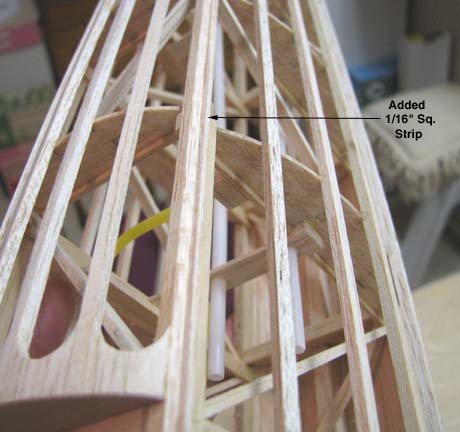
The edge 1/16" square balsa strip was trimmed
off at the same angle as the longeron bevel and then sanding down flush.
This produced an edge that was now 3/16" wide as shown below, which is
sufficient for cutting and splicing the covering materials
on........................Tandy