Comet Sailplane
Project
I have been putting the second covering of orange
silk on the fuselage for last two days working almost non-stop. Covering
with silk for me is a slow and intense process. As such, it is important to
take breaks between completing one panel and starting another in order to be
able to last all day. I know most of you can apply silk equally well or
better than I can, but for documentation purposes I took a number of
pictures while covering the fuselage that I want you see.
Because the pylon sides were each covered with a
single piece of orange silk, which included a part of the top of the
fuselage on the sides, it was necessary to cover the top of the fuselage in
three pieces. In the picture below, silk has been applied to the top of the
fuselage aft of the pylon.
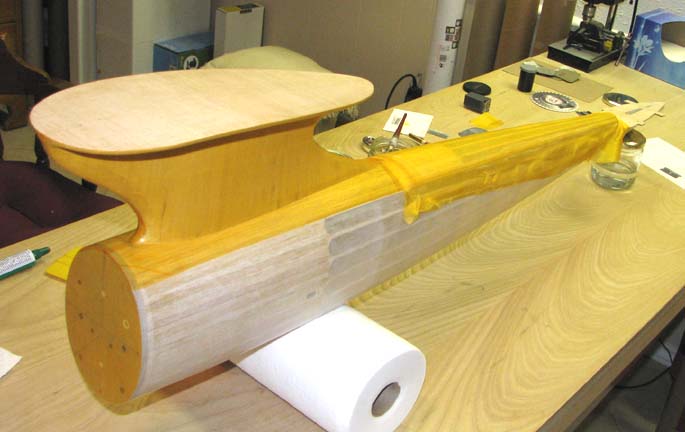
In this picture, the silk has been trimmed along
the narrow longeron line and one coat of clear nitrate dope brushed on.
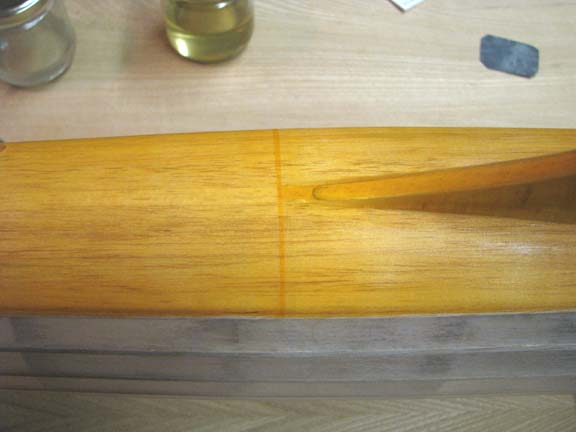
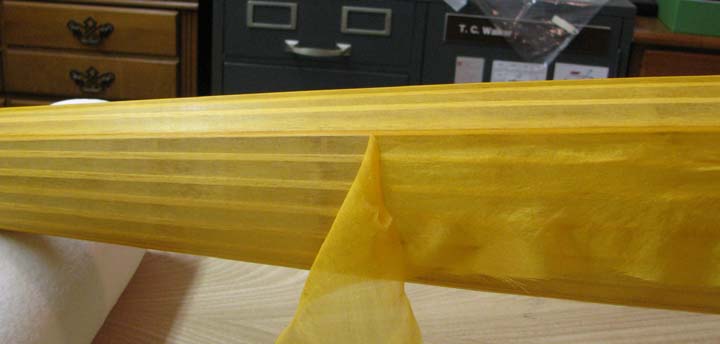
The 3/32" silk overlap seam just behind the pylon
shows up as a darker orange as shown below.
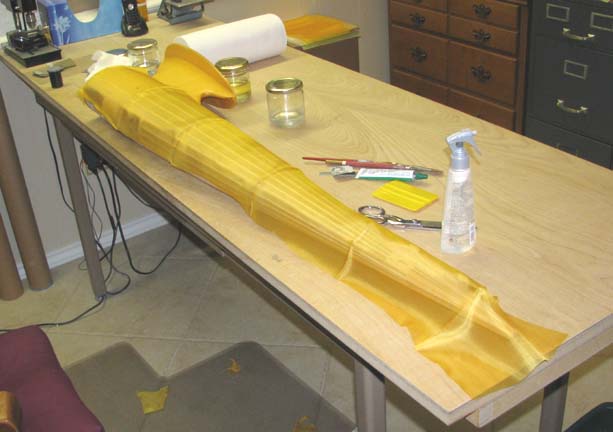
This picture shows the 8" X 50" piece of orange
silk draped on the fuselage in preparation for covering the left side.
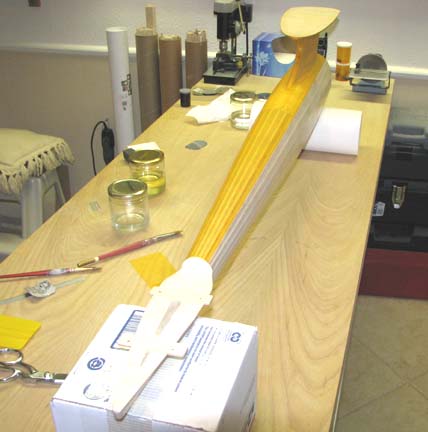
In the picture below, the silk on the
left side has been trimmed on the top and bottom along the narrow longeron
lines and one coat of clear nitrate dope brushed on.
I took this picture during the trimming of silk
along the narrow edge of the longeron. This is a most tedious effort in that
you do want the razor blade to run off the longeron and cut into the open
covered area. However, there must be some overlap to keep the bare wood from
showing so there is very little room for error! If you look close, this
results in not more than a 1/16" silk overlap running down the entire length
of the fuselage's narrow longeron. When I started the trim cut with the
razor blade, I never took a breath until I had reached the other end! Then I
came back and brush Acetone over the stuck silk and carefully pull it away
from the fuselage as shown below.
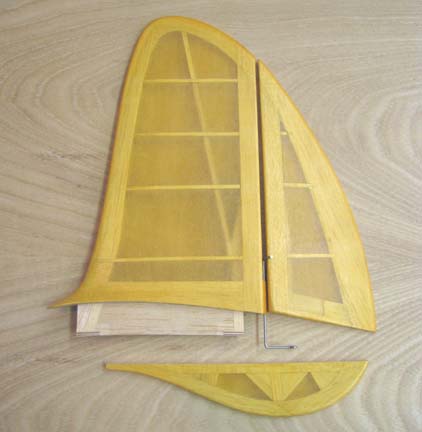
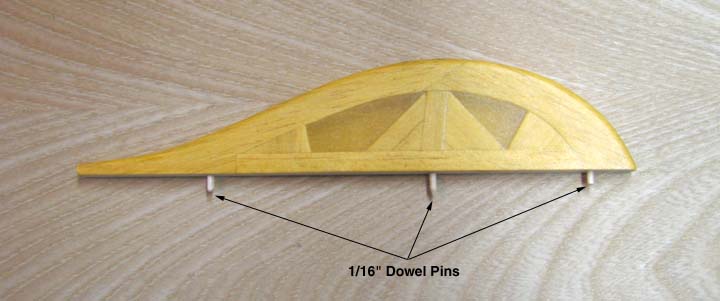
Once the fuselage covering was covered, the
finished sub rudder shown below that was discussed back in Report No.
81 could be installed on the fuselage.
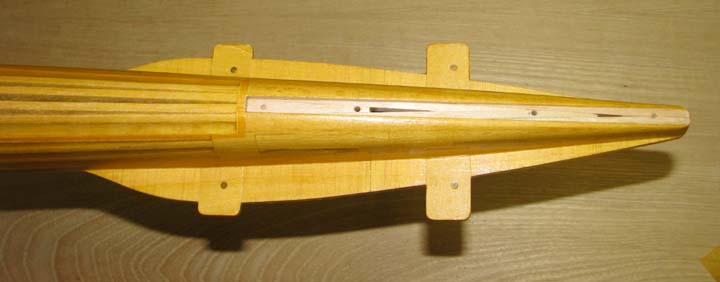
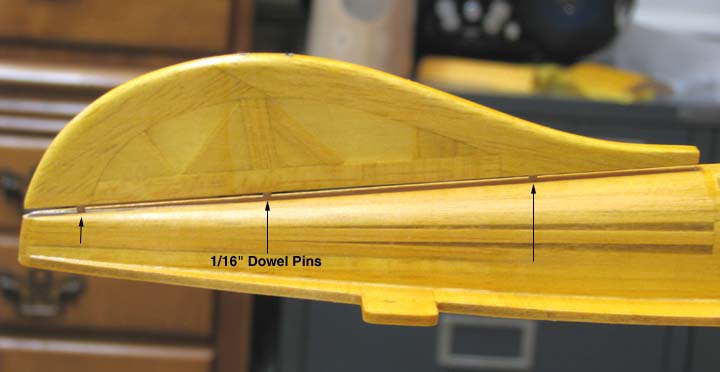
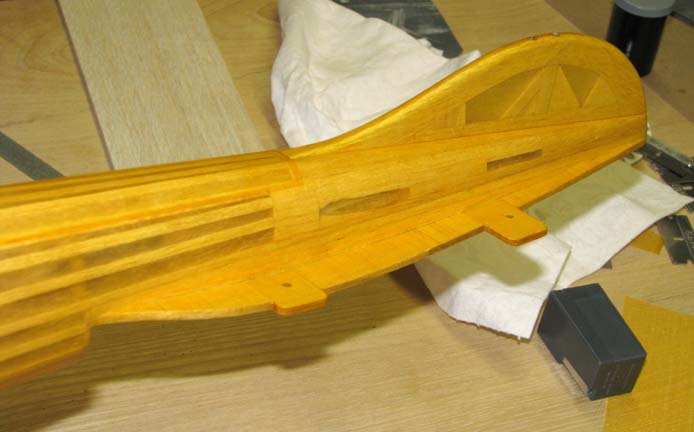
The slot at the back of the fuselage on the
bottom shown below was made to received the sub rudder. Notice the three
circular holes in the bottom of the slot.
Three 1/16" dowel pins were glued in the sub
rudder's root chord to plug into the three holes in the fuselage's slot.
These provide additional stiffening to the joint.
This shows the trial fit of the three dowel pins.
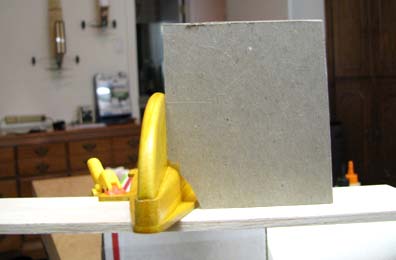
A card board square template was cut out and used
to check the alignment of the sub rudder with the plane of the stab platform
as shown below.
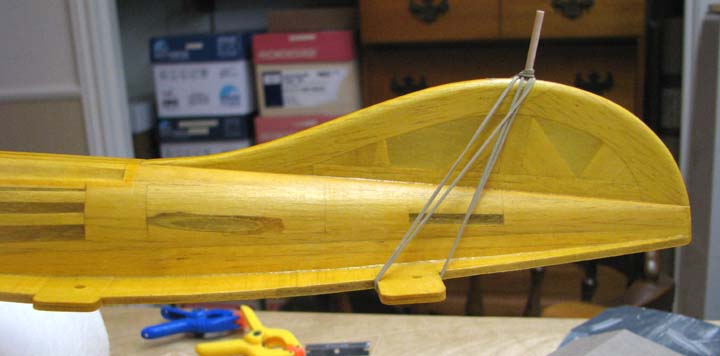
Next, a liberal amount of 15 minute epoxy was
mixed up and applied to the root and bottom edges of the sub rudder. The
dowel pins were placed in their corresponding holes in the fuselage and the
sub rudder was pushed into the slot tightly. The excess epoxy was forced up
along the sides of the sub rudder, which was then wiped clean using a Q-Tip
dipped in alcohol. The alcohol of course has no effect on the clear doped
silk. A 1/16" dowel was slipped into the removable tail skid receiver tube
in the edge of the sub rudder and rubber bands were used to hold the sub
rudder down and in place while the epoxy dried as shown below.
Once the epoxy had set up, the rubber bands were
removed and the sub rudder had become an integral part of the fuselage as
shown below.
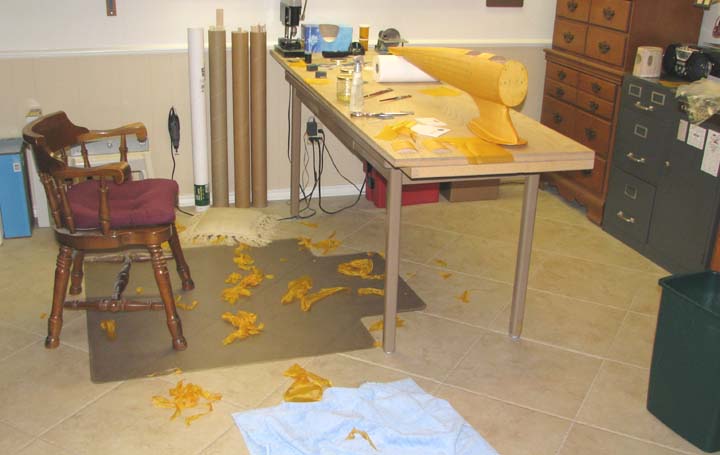
I took this picture to show how little waste of
orange silk there actually was.
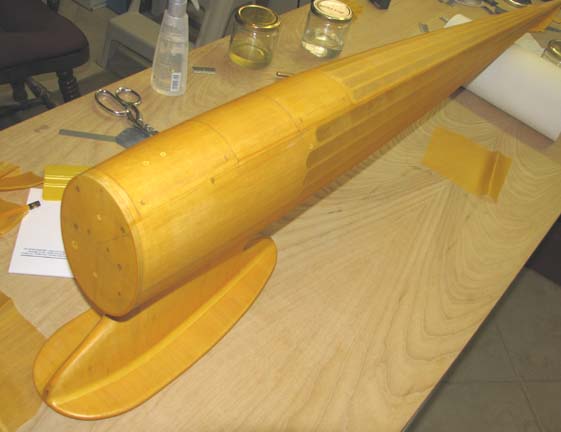
This picture shows the completion of the double
covered fuselage with the sub rudder bonded in place.
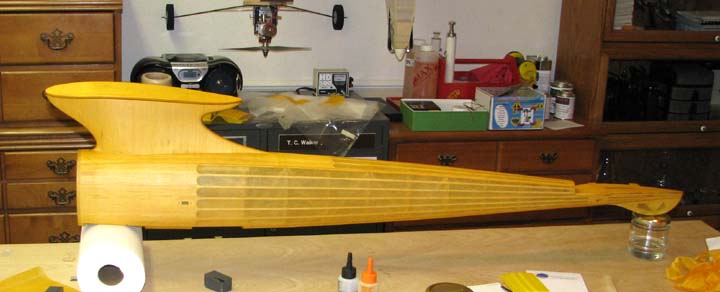
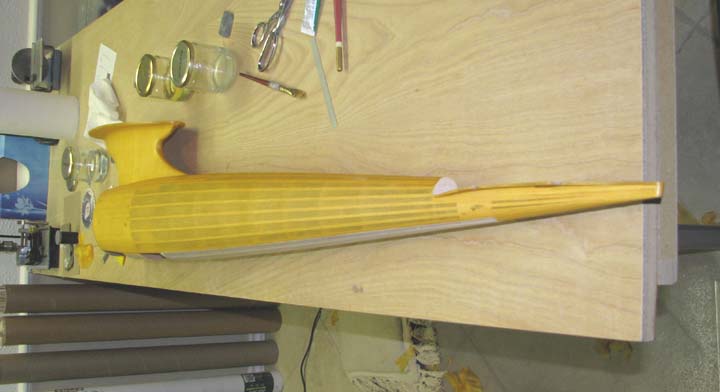
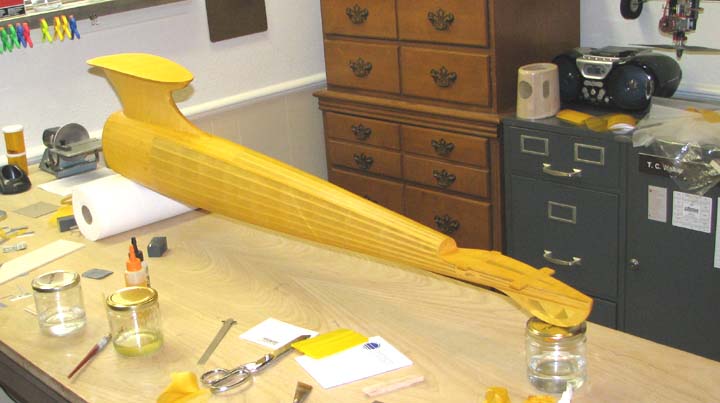
This is my favorite view showing the long slender
lines of the Sailplane's fuselage. Notice the two covered hatch covers and
cowl on the table in the background that has not yet been covered with
orange silk (I have the piece of
orange silk cut out and set aside to cover the cowl with).
Before I cover the cowl, I am going to mix up either Z-POXY or perhaps clear
Klass Kote epoxy and dope the complete interior of the cowl's wooden
structure with epoxy to fuel proof it. Once this has been done, the cowl
will then be covered in orange silk.
The forward ignition hatch cover and the aft
radio hatch cover are shown in place on the bottom of the fuselage below.
At this point in the covering and doping of the
Sailplane, my status id a s follows:
COATS OF CLEAR NITRATE DOPE
|
Component |
Wood |
Polyspan |
Silk |
|
Stab |
3 |
3 |
3 |
|
Sub Fins |
3 |
3 |
3 |
|
Elevators |
3 |
3 |
3 |
|
Fin |
3 |
3 |
3 |
|
Rudder |
3 |
3 |
3 |
|
Sub Rudder |
3 |
3 |
3 |
|
Wing |
3 |
3 |
1 |
|
Hatches |
3 |
3 |
1 |
|
Fuselage |
3 |
3 |
1 |
|
Cowl |
3 |
3 |
So my next step will be to mix up a large
quantity of clear nitrate dope and apply two more coats to the wing,
hatches, and fuselage. Then I will add a few drops of red and yellow Castin
Craft dye shown below to tint the clear nitrate dope orange to bring out the
rich orange color of the silk on the fuselage and give the fuselage three
more coats of orange tinted dope. Similar orange and yellow dope dying will
be done for the rudder, wing, and the stab.....................Tandy
