Comet Sailplane
Project
I want to follow up on an item that I discussed
in my last report where I said, "Because of the close tolerances on all of
the holes in the back of the cowl, the epoxy had to be cleaned out and the
back bulkhead of the cowl had to be sanded down some in order
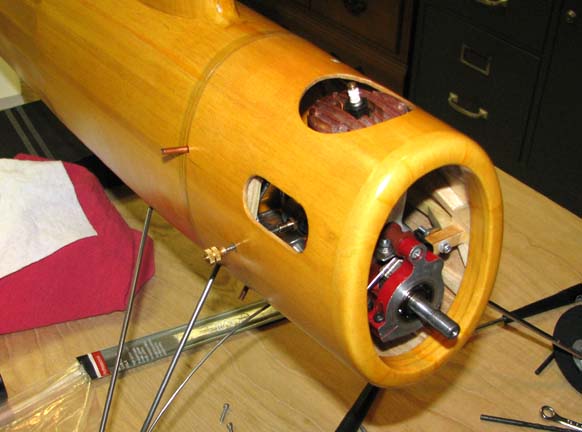
for the cowl to fit up against the firewall properly. The final fit is shown
in the picture below.
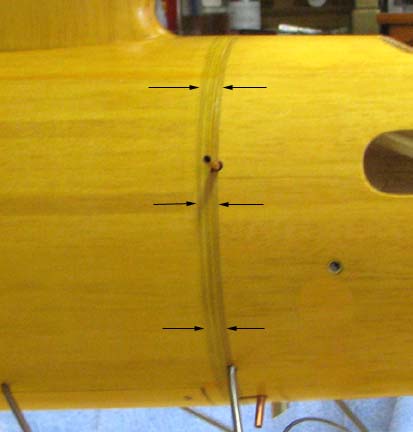
The biggest problem with the cowl's misfit was
that after it had been double covered with silk and doped several times, the
cowl seemed to be high at the top and the bottom causing a slight gap in the
fit in middle. I am not sure just how this happened, but it did! So as a
result of bar sanding the rear face of cowl's bulkhead, most of both
coverings of silk were sanded off at the top and bottom as shown below, but
the overall fit was significantly improved.
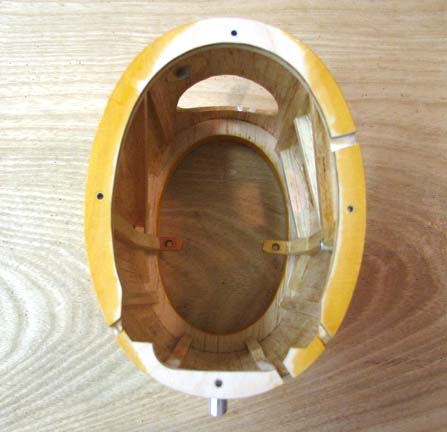
I had enough silk left over that I covered
the entire rear face of cowl's bulkhead again with a single covering of
orange silk as shown below.
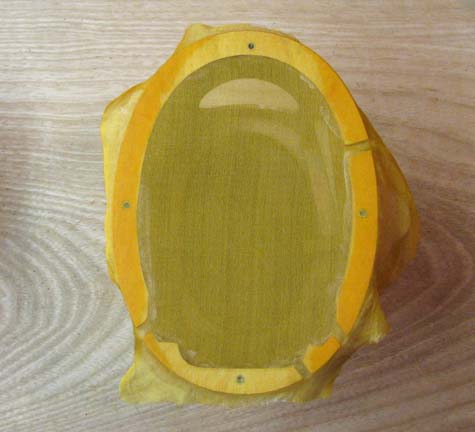
I doped the orange silk covering down three
times, trimmed off the excess, and doped it twice more as shown below. By
covering all of the cowl's rear face, the fit between the cowl and the
firewall is preserved.

While I have been spending so much time doping on
the Sailplane, I have been thinking about trying to flight test the new
Sailplane with the new McCoy 60 reproduction engine. It occurred to me that
I could the remove the original McCoy engine that is in the 96" Bomber and
install the new McCoy 60 reproduction engine. Since the Bomber's flight
characteristics are already established, I could check out the new 2.4 gHz
radio and evaluate how well the new McCoy 60 reproduction engine runs in the
Bomber before putting it in the new Sailplane. After some discussion with my
friends James Lollar and Jerry Burk, I decided to remove the original McCoy
engine that is in the big Bomber and put it in the Sailplane for the flight
test phase, since this engine's behavior and performance are already known.
James brought up another very good point I had not thought of. He said it
would appear to him that having the original McCoy 60 in the Sailplane would
be more appropriate than the not too popular Bomber.
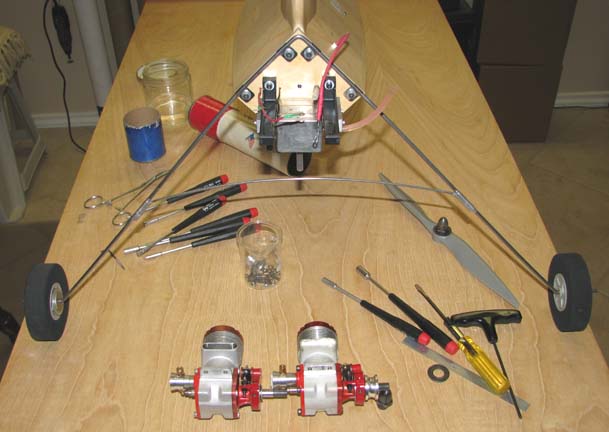
So this afternoon, I got completely side tracked
from my doping effort. I removed the original McCoy 60 from the Bomber as
shown below.
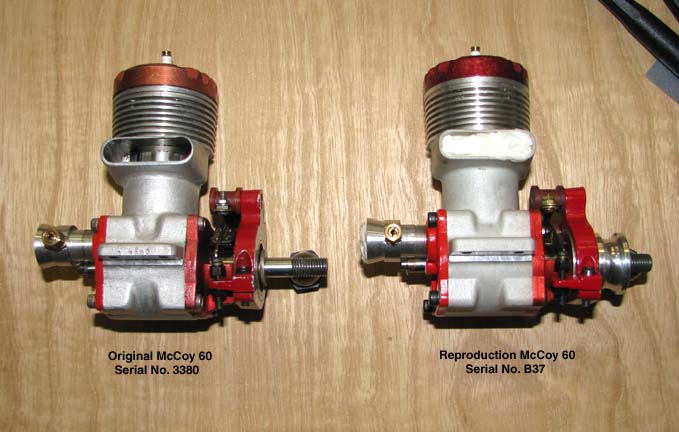
This is a close up of the two McCoy 60 engines
side by side.
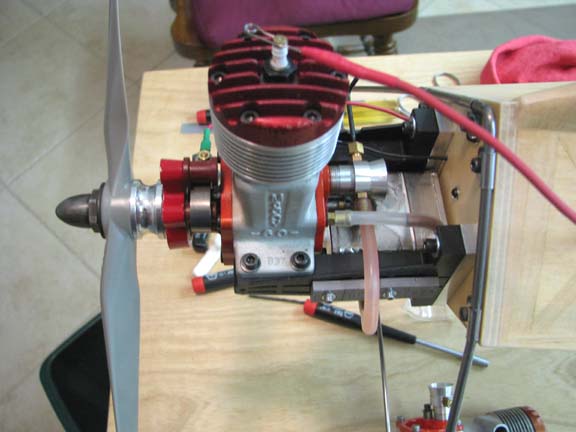
As you can see in the picture below, I now have
the new McCoy 60 reproduction engine in the Bomber as a test bed
for evaluating the engine's performance.
I installed the original McCoy 60 in the
Sailplane mounting to check the fit and the alignment of needle valve with
the hole in the cowl. I had to adjust the clock position of the rear venturi
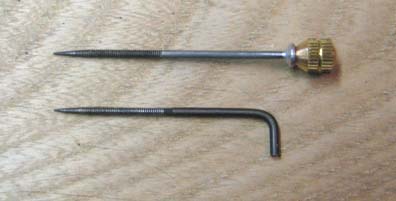
to achieve the desired alignment. Much to my surprise, when the needle valve
was inserted through the cowl hole and into the spray bar, the stem was not
long enough to completely close down.
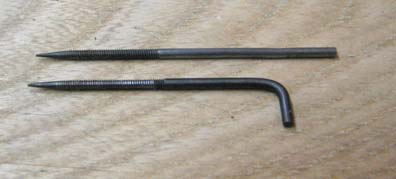
So I took a spare needle valve and carefully
straightened out the bend in the end to get additional stem length as shown
below.
However, since I had no way to rotate the
straight needle valve, I needed some kind of a knob on the end. I went
through my lamp parts box and found an old lamp switch. I removed the
knurled brass knob as shown below.
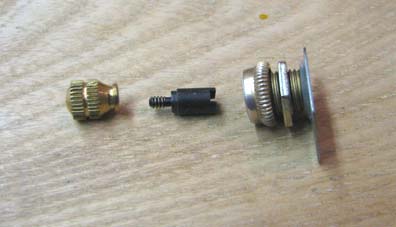
I wrapped the end of the needle valve stem with
some thin brass shim stock to achieve a snug fit inside the brass knob and
soldered the two together as shown below.
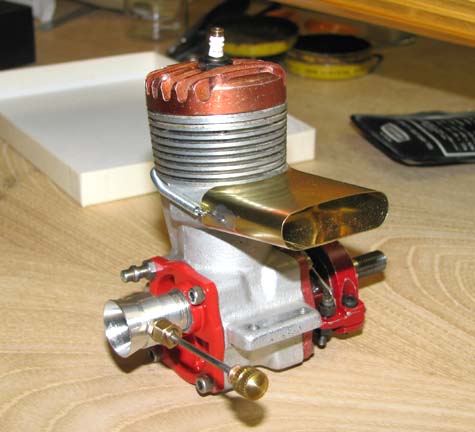
Then a test fit of the modified needle valve and
the exhaust extension was done on the original McCoy 60 engine as shown
below.
The final step was to mount the original McCoy 60
in the Sailplane and put on the cowl. As you can see below, the needle valve
is completely closed down with some stem length remaining and the stem is
accurately aligned with the center of the hole in the cowl. Well anyway,
tomorrow it is back to clear doping.................Tandy