Comet Sailplane
Project
A couple of years ago when I built my T-Bird free
flight I called several experienced free flighters (Larry Davidson, Gene
Wallock, and Steve Bruno) to obtain specific instructions on what to
use for the keys to center the wing on the wing saddle, how big to make
them, where to place the keys. There were some slight variations in opinion,
but they consistently advised to use a wooden dowel cut down the middle (half-dowel)
and to make the length of the half-dowel approximately 1/2" long. The
half-dowel provides a rolled shoulder for the wing saddle to slide up on
without tearing up the edge of the wing saddle when the wing is dislodged
due to impact. These half dowel segments (keys) are to be bonded on either
side of the wing saddle up near the leading edge and back near the trailing
edge. There were also recommendations on how to shape the ends of the keys
including either rounded or wedged).
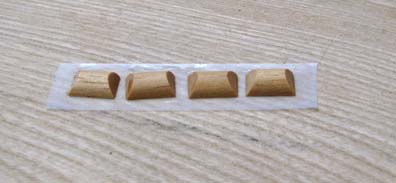
Using this same information, I applied it to
making and installing the wing keys on my Sailplane today. I cut a 3/8"
hardwood dowel into 1/2" lengths and tried to split them down the center.
Well, as you might guess, they split thicker on one side than the other. I
took the thicker side and trimmed and sanded it down to the desired
thickness. So I actually only got one key per 1/2" length. Once I had the
four half-dowel pieces, I sanded about a wedge on each end as shown below.
The flat side of these pieces were stuck to a piece of 3M tape and the top
side was given a couple of coats of clear dope to seal them.
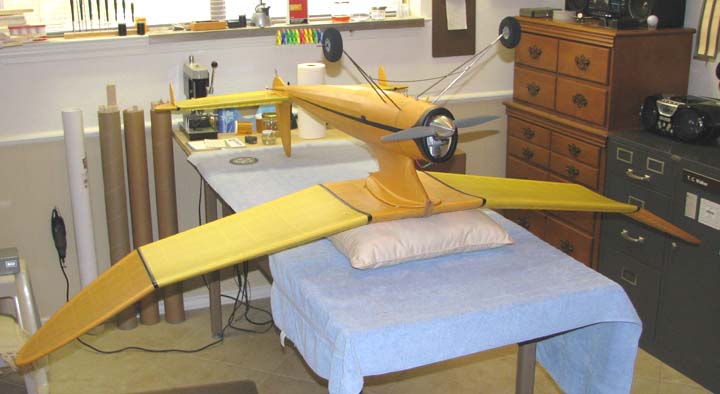
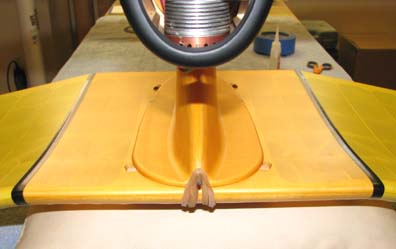
The wing was rubber banded to the wing saddle,
being careful to center the leading edge and trailing edge in the wing
saddle. The Sailplane was placed upside down on a pillow on the work table
as shown below.
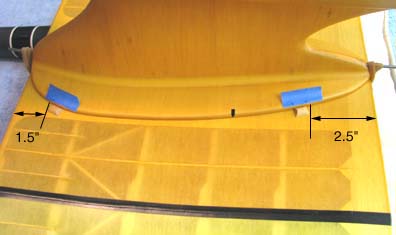
Blue masking tape was stuck to the bottom of wing
saddle. The front key was placed 1.5 " from the leading edge and the tape
marked. The rear key was placed 2.5 " from the trailing edge and the tape
marked as shown below. Two very small drops of medium CA were placed on the
flat bottom of the half-dowel pieces and they were carefully placed up
against the wing saddle between the two marks on the blue masking tape.
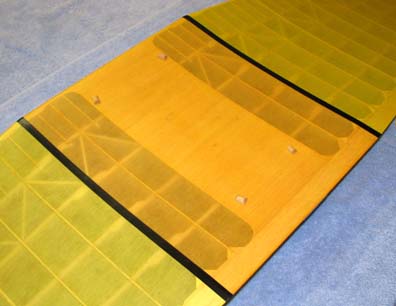
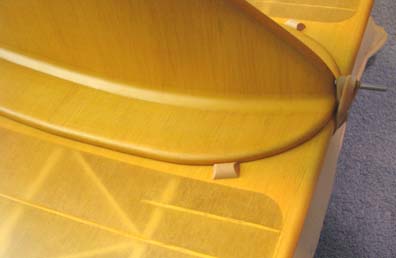
After letting the four keys set for about 15
minutes, the blue masking tape was removed as shown below.
A close up of the two front keys are shown
below.
A close up of the two rear keys are shown below.
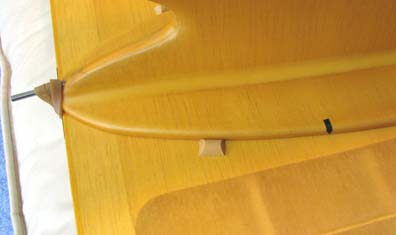
The rubber bands were removed and the wing
lifted from the wing saddle. I carefully ran a bead of CA on the wing saddle
side of the keys and immediately wiped the excess off with a Q-Tip so as not
to build up a fillet there. Then I went around the two ends and outside of
the keys with CA and let it dry as shown below.................Tandy