I spent part of yesterday afternoon and most of
the day today working on the Sailplane's servo and push rod installation.
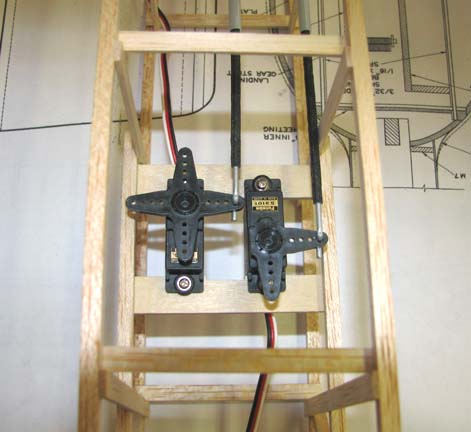
The two Futaba S3101 servo mountings viewed from the bottom of the fuselage
are shown below. The rudder servo is on the left and the elevator servo is
on the right.
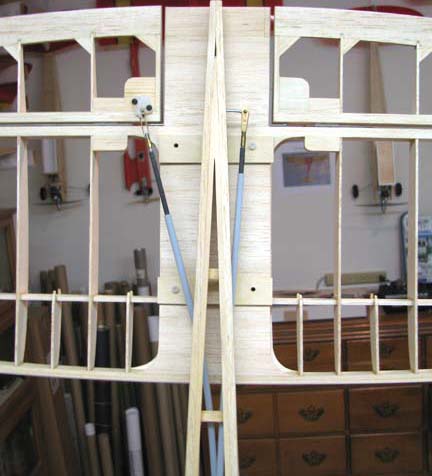
I selected the carbon fiber reinforced Sullivan
Precision Rod #581 for the rudder and elevator push rods. Carl
Goldberg's "ladder" type construction of the fuselage frame made the
attachment of the push rod guides on the 1/16" X 1/4" up rights a little
tricky. As you can see below, I used 1/2" wide 3/16" balsa blocks to tie the
guides to the up rights with.
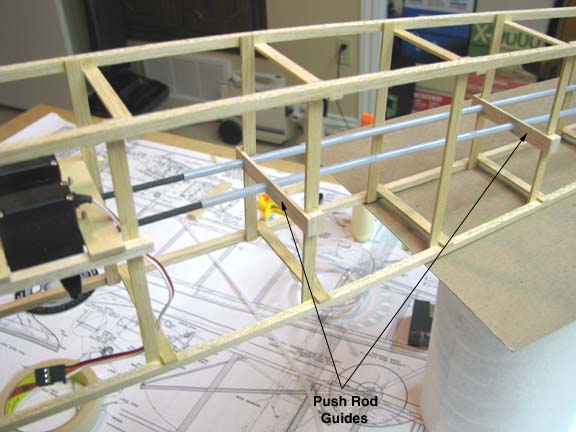
The push rods were installed down the length of
the fuselage frame using four push rod guides as shown below.
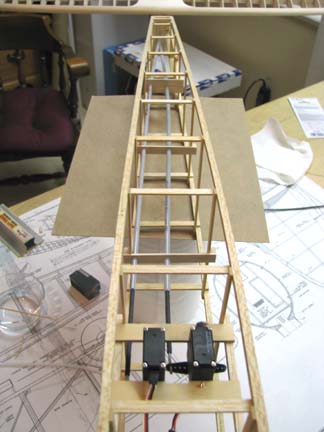
A piece of 3/16" balsa sheet stock was drilled
through at a shallow angle for the outer tube of the push rod to exit the
fuselage frame. This was glued to the upper and lower longerons under the
forward portion of the stab as shown below. Later on, after the fuselage
bulkhead pieces are attached and all of the 1/8" stringers installed, this
outer tube will be trimmed off flush to outer portion of the fuselage.
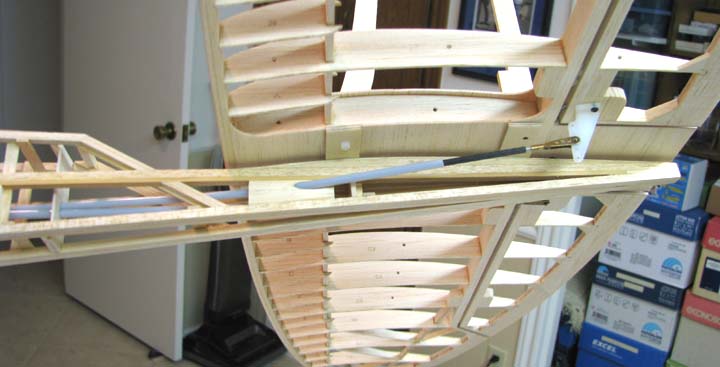
This is a nice shot looking up from the bottom
showing the exit angles that align both the rudder and elevator push rods
with their respective control horns.
Tomorrow I will remove the push rods and sand the
push rod outer tubes with 400 emery paper. Then I will reinstall them and
epoxy them in place along each push rod guide hole and at the exit from the
fuselage. The next step will be to start the installation of the
Futaba Fasst receiver, flight battery pack, and switch harness. All
of this has to be done before the bulkhead pieces are glued in place and
then the diagonals for torsional stiffness can be added. As you can see,
this is really a complex and time consuming structure to build. Adding the
rudder and elevator control surfaces had to be thought out very
carefully..........................Tandy