Speed 400
Cloudster Project
My cold is still with me, but I am beginning to
feel a some better so I decided to do a little work on the Cloudster. I may
need the ability to shift the large Li-Po battery back slightly to trim
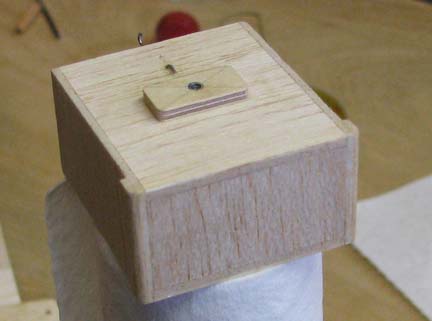
the balance point. To do this, first a vertical grain 1/16" balsa back was
put in the open battery box as shown below.
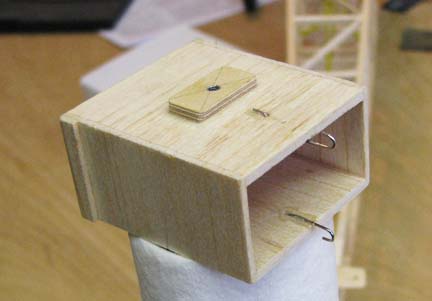
Next, two hooks were bent up out of extra long
straight pins to shape and CA'd to the battery box's top and bottom as shown
below. These hooks have a half-loop on one end for a rubber band to hook
into and Z-Bend on the other to hook through the balsa as can be seen below.
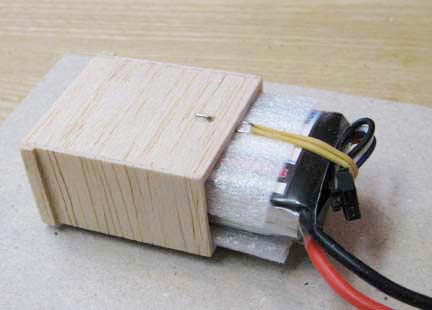
This allows the battery to be secured in its box
with a single No. 10 rubber band as shown below. Now the battery can be
moved aft in the box by placing a balsa filler or spacer in the box before
the battery is secured.
In the picture below, you can see the battery and
box installed in the bottom of the fuselage.

I hang the fuselages of all of my models on the
wall of the model room as shown below. Notice the Class B Airborn fuselage
on the extreme right.

In this close up, you can see how the Airborn is
hung on the wall. During construction, I insert a piece of white ABS plastic
tubing through the fuselage's structure at the rear and sand it down
flush with the fuselage's sides before covering. This permits the model to
be hung on the wall with loop of waxed cord that runs from the hook on the
wall, down through the insert, and then back up to hook as shown below.

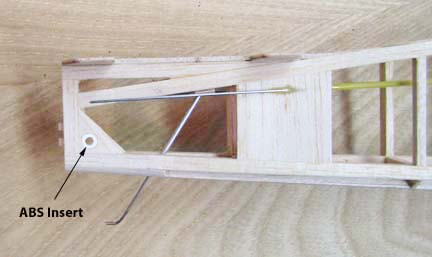
As you can see in the picture below, an ABS
plastic insert has been installed through the two large gussets between the
lower longeron and tail post. Thisd will permit the Cloudster fuselage to be
hung on the wall in a similar manner.
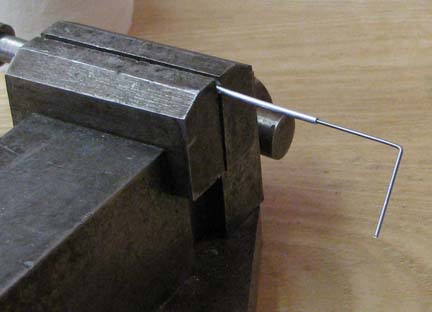
The wire tail skid inserted in the aluminum tube
in the picture above was made out 0.035" piano wire, but I could never
locate any more 0.035" piano to wire to make a landing gear for the tail
wheel. Since 0.032" piano wire was loose inside the aluminum tube,
particularly in torsion, I conducted a test using 0.032" piano wire and a
separate length of aluminum tubing. A slight zig-zag was bent in the .032"
wire and the wire inserted into the aluminum tube. The wire fit pretty
tightly, but could be rotated very easily. Then I placed a drop of thin CA
on the wire and it instantly wicked down in between the wire and the tube. I
rotated the wire around several times and them let wire/tube combination set
for about an hour. The tube was then placed in the table vise shown below
and I proceeded to twist the wire. It was rock solid! In fact, I twisted the
aluminum tube off in the vise without the wire ever rotating relative to the
tube. This proves that the 0.032" could be used to make the landing gear for
the tail wheel.
A tail wheel landing gear was bent up out of
0.032" piano wire for an aluminum hub 3/4" tail wheel. Again a slight
zig-zag was put into the portion of the wire that slides up into the
aluminum tube. A trial fit of the tail wheel is shown below, but the wire
will not be CA'd in place until after the fuselage is covered. By the way,
the weight of the tail wheel assembly is less than 2 grams.

Hopefully tomorrow I will feel good enough to
finally start on our income taxes..................Tandy