42 J-3 Cub Dummy
Cylinders On Right Side of Fuselage
I received a suggestion from an FAC guy, Richard Adams, on how to mount the dummy cylinders, which I ended up using on the right side of the fuselage. His e-mail said:
Okay, now this is just an
idea...what if you glued the cylinders on a piece of thin ply so you could
have the cylinders as shown in the second picture, more realistic looking,
but keep them together with the main fuselage. There still a danger of
bumping the cylinder when attaching the nose block, but they would probably
be stronger as a unit..............Rich
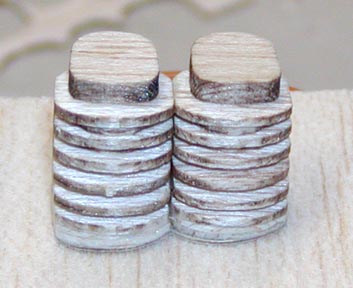
To begin with,
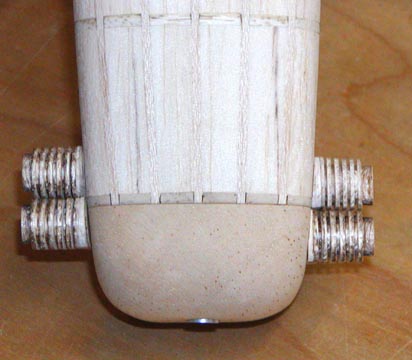
I bonded the two right side dummy cylinders to a piece of 1/64" plywood as
shown below. I was careful to also apply glue to the inside edges of the
cylinder fins to bond them together as well making the two-cylinder unit
very solid.
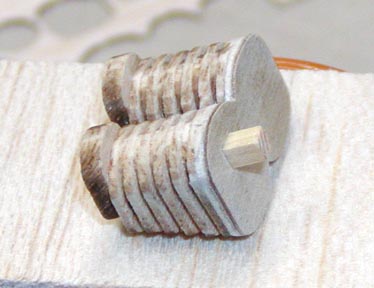
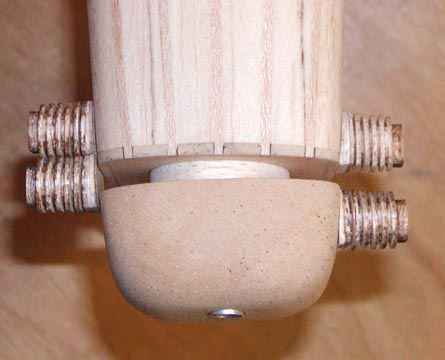
This is a view from the back side of the right
cylinder assembly showing the 1/64" plywood plate and the spruce
strip inside the aft cylinder, which protrudes out an 1/8" in length for
mounting.
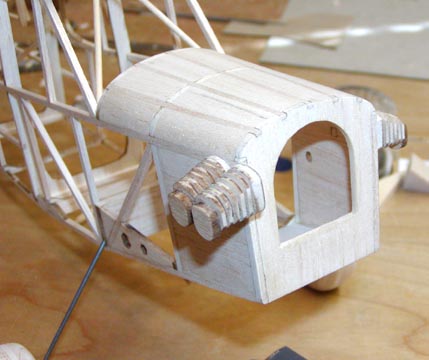
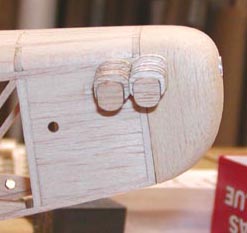
This shows the right side dummy cylinder assembly
positioned on the fuselage, but not glued in.
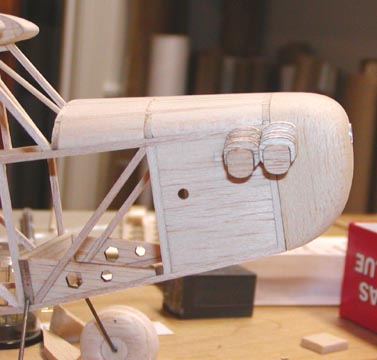
This is another view of the right side dummy
cylinder assembly on the fuselage.
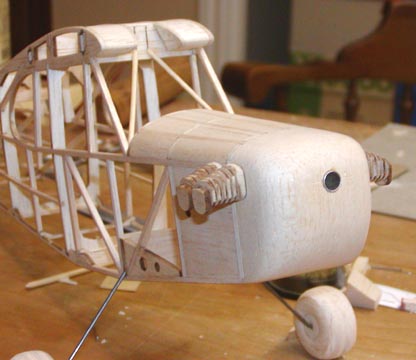
This view from the top with the nose block in
place shows how the right side cylinders are positioned slightly aft of the
left side cylinders like the actual four-cylinder opposed Continental engine
has. Notice the wedge shaped wafer on the base of each cylinder required to
keep the dummy cylinders perpendicular to the center line of the fuselage.
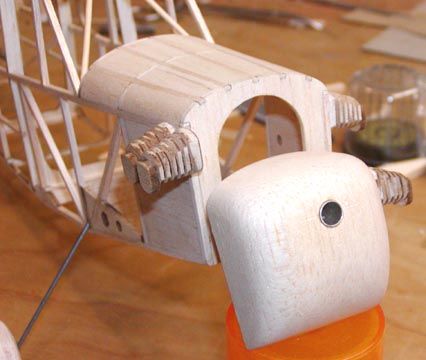
This shows the nose block partially pulled away
from the fuselage taking the left front cylinder with it and the right front
cylinder staying with the fuselage. None of the cylinders will be glued in
until after the fuselage has been covered and the dummy cylinders have been
painted.
This shows the nose block completely removed.
This shows all of the dummy cylinders with the
nose block removed and positioned in the fore ground.
After Thoughts
I have done all I can with this @#$!! wide
unscale front end using these dummy cylinders to try and capture the
character of the J-3 Cub as shown below and still have a functional flying
model, which
does require removal of the nose block. I know
many of you probably think I have wasted my time since it doesn't look very
scale anyway, but remember, I am trying to salvage this project as best I
can.
On that note, it has occurred to me that I have
another major problem to face when Mike Midkiff helps me test fly and trim
this model. If you recall, I built in 4 degree down thrust and 2 degree
right thrust when I drilled the thrust bearing hole in the nose block. This
was Mike's recommendation, but only as a starting point. During the initial
flight test, Mike may have to add or subtract to these values by shimming
the sides and/or top and bottom of the nose block. Well, that is most
certainly going screw up the dummy cylinder alignments! :O<
.............................Tandy