J-3 Cub Nose Block
Key and Deck Inlay
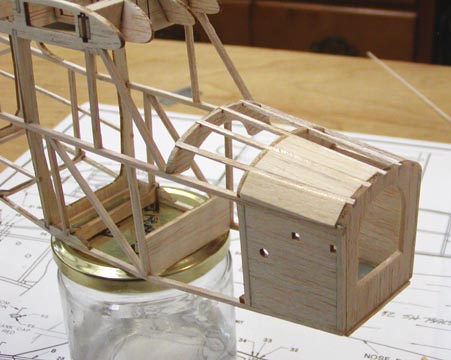
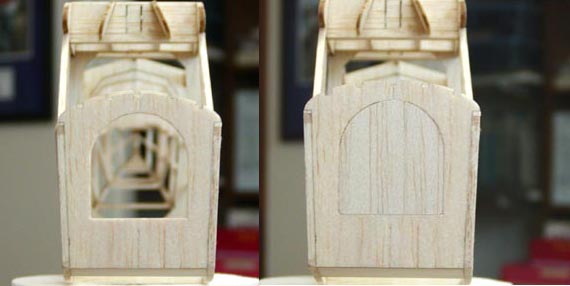
Well, this afternoon the J-3 Cub kept calling to me from the model room so I broke down and did a little on it today. I had received a e-mail from Jim O'Reilly recommending I key the nose block in some way so it always fits onto the fuselage the same way. I like geometric patterns so I decided to cut a square opening on the bottom and tangent to the circular hole in the 3/32" front bulkhead as shown on the left below. Then I cut out an 1/8" plug to fit the new opening in the front bulkhead as shown on the right below. This plug will be glued to rear face of the nose block thus providing the Key that Jim was talking about.
The plans called for a bond paper covering to go
over the forward deck in front of the cabin before covering with tissue.
Mike Midkiff on the other hand had suggested that I cover the deck with
1/32" balsa sheeting. I was concerned about the bond paper wrinkling and I
didn't like the idea of trying to cut the deck bulkheads down to account for
the balsa sheeting. Since neither of these techniques appealed to me, I got
my old Model Builder rubber powered book, "Flying Scale Models of WW II" by
William C. Northrop, Jr. As I was looking through the section in the back,
"Building and Finishing" by J.D. McHard, I found an interesting discussion
on inlaying pieces of soft 1/16" balsa sheet between stringers and
bulkheads. The picture below shows what I am talking about.
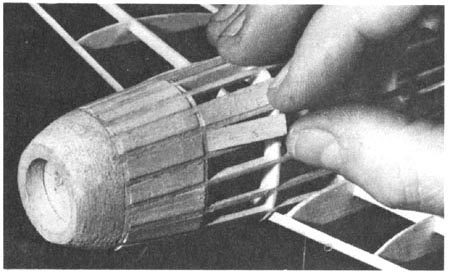
So I got out my box of scrap sheet balsa pieces
and selected several very soft 1/16" pieces. With some initial trial and
error, I finally figured out the method using slightly thinned Titebond
aliphatic glue. The picture below shows the three pieces I have inlaid so
far. I think this is really going to work out well. However, it is almost
time for the Cowboy game so I will stop for
tonight.......................Tandy